Linux目录和文件的权限设置
要求就是:
- 将当前目录中的所有“子目录”的权限设置为755;
- 将当前目录中的所有“文件”的权限设置为644。
解决方法:
chmod 644 -R *
chmod 755 `find -type d`
也可以用find彻底些:
find /path -type f -exec chmod 644 {} /;
find /path -type d -exec chmod 755 {} /;
转自:
要求就是:
解决方法:
chmod 644 -R *
chmod 755 `find -type d`
也可以用find彻底些:
find /path -type f -exec chmod 644 {} /;
find /path -type d -exec chmod 755 {} /;
转自:
删除自带web、数据库、php
yum remove httpd* php* mysql-server mysql* php-mysql -y
删除不需要的程序
yum remove Deployment_Guide-en-US finger cups-libs cups ypbind bluez-libs desktop-file-utils ppp rp-pppoe wireless-tools irda-utils sendmail* samba* talk-server finger-server bind* xinetd nfs-utils nfs-utils-lib rdate fetchmail eject ksh mkbootdisk mtools syslinux tcsh startup-notification talk apmd rmt dump setserial portmap yp-tools -y
yum groupremove "Mail Server" "Games and Entertainment" "X Window System" "X Software Development" "Development Libraries" "Dialup Networking Support" "Games and Entertainment" "Sound and Video" "Graphics" "Editors" "Text-based Internet" "GNOME Desktop Environment" "GNOME Software Development" -y
yum -y groupremove "FTP Server" "PostgreSQL Database client" "PostgreSQL Database server" "MySQL Database server" "MySQL Database client" "Web Server" "Office Suite and Productivity" "E-mail server" "Ruby Support" "Printing client"
关闭selinux
setenforce 0
sed -i 's/^SELINUX=.*$/SELINUX=disabled/' /etc/selinux/config
对系统进行一些优化
sed -i 's/^id:.*$/id:3:initdefault:/' /etc/inittab
init q
[ -z "`cat ~/.bashrc | grep ^PS1`" ] && echo 'PS1="[e[37;40m][[e[32;40m]u[e[37;40m]@h [e[35;40m]W[e[0m]]\$ "' >> ~/.bashrc
sed -i 's/^HISTSIZE=.*$/HISTSIZE=10/' /etc/profile
[ -z "`cat ~/.bashrc | grep history-timestamp`" ] && echo "export PROMPT_COMMAND='{ msg=$(history 1 | { read x y; echo $y; });user=$(whoami); echo $(date "+%Y-%m-%d %H:%M:%S"):$user:`pwd`/:$msg ---- $(who am i); } >> /tmp/`hostname`.`whoami`.history-timestamp'" >> ~/.bashrc
[ -z "`cat /etc/security/limits.conf | grep 'nproc 65535'`" ] && cat >> /etc/security/limits.conf <> /etc/rc.local
[ "$(hostname -i | awk '{print $1}')" != "127.0.0.1" ] && sed -i "s@^127.0.0.1(.*)@127.0.0.1   `hostname` 1@" /etc/hosts
[ -z "`cat /etc/pam.d/system-auth | grep 'pam_tally2.so'`" ] && sed -i '4a auth        required      pam_tally2.so deny=5 unlock_time=180' /etc/pam.d/system-auth
输入vi自动打开vim
[ -z "`cat ~/.bashrc | grep 'alias vi='`" ] && sed -i "s@alias mv=(.*)@alias mv=1nalias vi=vim@" ~/.bashrc && echo 'syntax on' >> /etc/vimrc
升级系统
yum -y update
yum clean all
美化命令行,其实在之前优化那里就美化了,这里只是让它生效而已
. /etc/profile
. ~/.bashrc
删除不需要的服务,这里自行考虑,反正我是只保留几个的~
service modules_dep stop
chkconfig modules_dep off
chkconfig --del modules_dep
service netconsole stop
chkconfig netconsole off
chkconfig --del netconsole
service netfs stop
chkconfig netfs off
chkconfig --del netfs
service nscd stop
chkconfig nscd off
chkconfig --del nscd
service quota_nld stop
chkconfig quota_nld off
chkconfig --del quota_nld
service rdisc stop
chkconfig rdisc off
chkconfig --del rdisc
service restorecon stopd
chkconfig restorecond off
chkconfig --del restorecond
service saslauthd stop
chkconfig saslauthd off
chkconfig --del saslauthd
service snmpd stop
chkconfig snmpd off
chkconfig --del snmpd
service snmptrapd stop
chkconfig snmptrapd off
chkconfig --del snmptrapd
service gpm stop
chkconfig gpm off
chkconfig --del gpm
service iscsi stop
chkconfig iscsi off
chkconfig --del iscsi
service iscsid stop
chkconfig iscsid off
chkconfig --del iscsid
service lm_sensors stop
chkconfig lm_sensors off
chkconfig --del lm_sensors
service lvm2-monitor stop
chkconfig lvm2-monitor off
chkconfig --del lvm2-monitor
service mcstrans stop
chkconfig mcstrans off
chkconfig --del mcstrans
service messagebus stop
chkconfig messagebus off
chkconfig --del messagebus
service multipathd stop
chkconfig multipathd off
chkconfig --del multipathd
service netconsole stop
chkconfig netconsole off
chkconfig --del netconsole
service netfs stop
chkconfig netfs off
chkconfig --del netfs
service netplugd stop
chkconfig netplugd off
chkconfig --del netplugd
service nscd stop
chkconfig nscd off
chkconfig --del nscd
service rawdevices stop
chkconfig rawdevices off
chkconfig --del rawdevices
service rdisc stop
chkconfig rdisc off
chkconfig --del rdisc
service restorecond stop
chkconfig restorecond off
chkconfig --del restorecond
service ntpd stop
chkconfig ntpd off
chkconfig --del ntpd
service ip6tables stop
chkconfig ip6tables off
chkconfig --del ip6tables
service ntpdate stop
chkconfig ntpdate off
chkconfig --del ntpdate
service portreserve stop
chkconfig portreserve off
chkconfig --del portreserve
service udev-post stop
chkconfig udev-post off
chkconfig --del udev-post
service exim stop
chkconfig exim off
chkconfig --del exim
之前单位用的kangle服务器,便于快速搭建网站。
但是现在不想用了,如何删除呢?
其实很简单:
service kangle stop
chkconfig kangle off
chkconfig --del kangle
rm -rf  /vhs
rm -f /etc/init.d/kangle
现在重启看看,是不是已经删除的很干净了!
##ps.这个删除流程也可以针对其他服务使用!##
顺便提一下
删除Apache可以用rpm -qa|grep apache|xargs rpm -e,一次删除所有与Apache有关的包
PHP的安装最头疼的就是因为某些类库没有安装而报错,所以编译前请确保以下包已安装
yum groupinstall "development tools"

yum install -y gcc gcc-c++ autoconf libjpeg libjpeg-devel libpng libpng-devel freetype freetype-devel libpng libpng-devel libxml2 libxml2-devel zlib zlib-devel glibc glibc-devel glib2 glib2-devel bzip2 bzip2-devel ncurses curl curl-devel openssl-devel gdbm-devel db4-devel libXpm-devel libX11-devel gd-devel gmp-devel readline-devel libxslt-devel expat-devel xmlrpc-c xmlrpc-c-devel
高大上的编译选项
./configure  \
--prefix=/usr/local/php  \
--enable-fpm  \
--with-curl  \
--with-openssl  \
--enable-mbregex  \
--with-mysql  \
--with-mysqli  \
--with-mysql-sock  \
--enable-pdo  \
--with-pdo-mysql  \
--with-pdo-pgsql  \
--with-pdo-sqlite  \
--enable-mysqlnd  \
--with-gd  \
--enable-gd-native-ttf  \
--enable-exif  \
--with-jpeg-dir=/usr/local/jpeg  \
--with-png-dir=/usr/local/png  \
--with-freetype-dir=/usr/local/freetype  \
--enable-gd-jis-conv  \
--with-gettext  \
--with-zlib  \
--enable-zip  \
--with-bz2  \
--disable-fileinfo  \
--enable-xmlreader  \
--enable-xmlwriter  \
--with-xmlrpc  \
--enable-mbstring  \
--enable-inline-optimization \
20150524更新 5.6.9编译配置选项,推荐使用
./configure --prefix=/usr/local/php --with-pdo-pgsql --with-pdo-sqlite --with-zlib-dir --with-freetype-dir --enable-mbstring --with-libxml-dir=/usr --enable-xmlreader --enable-xmlwriter --enable-soap --enable-calendar --with-curl --with-mcrypt --with-zlib --with-gd --with-pgsql --disable-rpath --enable-inline-optimization --with-bz2 --with-zlib --enable-sockets --enable-sysvsem --enable-sysvshm --enable-pcntl --enable-mbregex --enable-exif --enable-bcmath --with-mhash --enable-zip --with-pcre-regex --with-mysql --with-pdo-mysql --with-mysqli --with-mysql-sock --enable-mysqlnd --with-jpeg-dir=/usr --with-png-dir=/usr --enable-gd-native-ttf --with-openssl --enable-ftp --with-imap=/usr/local/php-imap --with-imap-ssl --with-kerberos --with-gettext --with-xmlrpc --with-xsl --enable-opcache --enable-fpm --with-fpm-user=www --with-fpm-group=www --disable-fileinfo
编译中出了问题请参考
如果内存小于1G,需要加上--disable-fileinfo
添加环境变量
whereis php
#/usr/local/bin/php
echo $PATH
#/usr/local/sbin:/usr/local/bin:/sbin:/bin:/usr/sbin:/usr/bin:/root/bin
export PATH=/usr/local/php/bin:$PATH
echo $PATH
#/usr/local/php/bin:/usr/local/sbin:/usr/local/bin:/sbin:/bin:/usr/sbin:/usr/bin:/root/bin
php -v
#PHP 5.6.0 (cli) (built: Sep 10 2014 23:54:43)
ps./etc/profile:在登录时,操作系统定制用户环境时使用的第一个文件,此文件为系统的每个用户设置环境信息,当用户第一次登录时,该文件被执行
pss./etc/environment:在登录时操作系统使用的第二个文件,系统在读取你自己的profile前,设置环境文件的环境变量。
pss.~/.bash_profile:在登录时用到的第三个文件是.profile文件,每个用户都可使用该文件输入专用于自己使用的shell信息,当用户登录时,该 文件仅仅执行一次!默认情况下,他设置一些环境变游戏量,执行用户的.bashrc文件。/etc/bashrc:为每一个运行bash shell的用户执行此文件.当bash shell被打开时,该文件被读取.
pss.~/.bashrc:该文件包含专用于你的bash shell的bash信息,当登录时以及每次打开新的shell时,该该文件被读取。
vim /etc/profile
在最后一行加上:export PATH="/usr/local/php/bin:$PATH"
最后:
source /etc/profile
或者直接把php拷贝至/usr/local/bin/下
cp /usr/local/php/bin/php /usr/local/bin/
cp /tmp/php-5.6.0/php.ini-production /usr/local/php/etc/php.ini
/usr/local/php/sbin/php-fpm
运行时指定配置文件
/usr/local/php/sbin/php-fpm -c /usr/local/php/etc/php.ini -y /usr/local/php/etc/php-fpm.conf
开机自启动
echo "/usr/local/php/sbin/php-fpm -c /usr/local/php/etc/php.ini -y /usr/local/php/etc/php-fpm.conf" >> /etc/rc.local
或者
vim /etc/rc.local

# ADD
/usr/local/php/sbin/php-fpm -c /usr/local/php/etc/php.ini -y /usr/local/php/etc/php-fpm.conf
配置文件路径/usr/local/php/etc/php-fpm.conf
中文总是能引出很多麻烦,所以推荐安装系统的时候不要选择任何与中文有关的选项。
但是如果很不幸你选了中文作为系统语言,还是有补救的办法的。
很简单,请看下面的代码:
编辑i18n:
vi /etc/sysconfig/i18n
将LANG="zh_CN.UTF-8"改为LANG="en_US.UTF-8"即可!
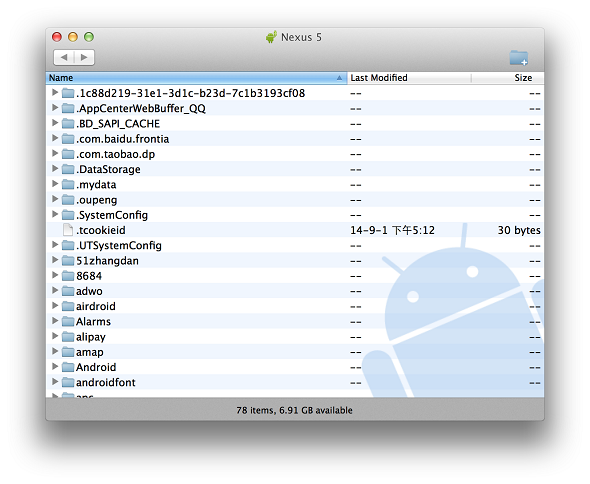
今天给老娘的Mi2S刷机,研究了一下在mac上刷机的方法,在此记录一下。
PS.本方法适用于所有Android机器
安装Android File Transfer
brew cask install android-file-transfer
要在OSX上管理Android手机上的文件,需要下载安装这个官方工具http://www.android.com/filetransfer/
由于某些特殊原因网站打不开不要紧,不会翻墙的TX可以到我的网盘下载到目前最新的Android File Transfer。
下载安装完成后运行,就可以轻松管理手机文件了,这个时候把下载好的ROM拷贝到手机目录下,再进入recovery刷机了。
安装adb工具
brew cask install android-platform-tools
接下来再terminal中运行adb和fastboot即可开始刷机

**小提示:**刷机用到的命令可以参考博主的这篇文章adb,fastboot常用命令及刷机技巧
部分参考来自: