mysql的默认的root用户会有很多行,自习观察后你就会发现每行的用户名或密码可能相同,但是host一定不同,host是登陆用户的主机名,也就是说,'localhost','127.0.0.1','phpgao.local','%'都算不同的用户!

理解了这一点后,那么我的问题就附上水面了!

有些TX经常会遇到这个问题:

使用PHP连接mysql数据库,使用localhost作为主机名总是连接失败,但是使用'127.0.0.1'就可以顺利连接,这到底是为什么?

mysql中HOST为localhost和127.0.0.1到底有什么区别?

经过一番搜索,老高总结如下:

使用到的命令

mysql>status;
mysql>show grants;
  1. 类Unix系统下,如果不使用-h指定主机名或者使用了localhost,那么会使用unix domain socket与mysql服务器沟通,比TCP/IP快一些!所以你想使用TCP/IP协议,请将host指定为'127.0.0.1'。

  2. PHP连接mysql如果使用'localhost'发生问题,首先可以明确的是PHP会试着使用unix domain socket与服务器连接,所以请检查php.ini中mysql.default_socket = /var/mysql/mysql.sock是否配置正确。

  3. 如果想要明确连接方式,可以再配置文件中显式声明

protocol=tcp
  1. 在mysql的官方文档中解释道:如果mysql在win上跑,如果系统开启了--enable-named-pipe,然后访问服务器的时候没有指定hostname,那么mysql客户端会以pipe为优先连接,如果连接失败,那么再会去尝试使用TCP/IP去连接。你可以指定hostname为.在win下强制使用pipes。

If the MySQL server is running on Windows, you can connect using TCP/IP. If the server is started with the --enable-named-pipe option, you can also connect with named pipes if you run the client on the host where the server is running. The name of the named pipe is MySQL by default. If you do not give a host name when connecting to mysqld, a MySQL client first tries to connect to the named pipe. If that does not work, it connects to the TCP/IP port. You can force the use of named pipes on Windows by using . as the host name.

Reference:

http://stackoverflow.com/questions/19712307/mysql-localhost-127-0-0-1 http://stackoverflow.com/questions/3715925/localhost-vs-127-0-0-1 http://dev.mysql.com/doc/refman/5.5/en/can-not-connect-to-server.html http://madproject.com/general/connect-to-mysql-using-localhost-instead-of-127-0-0-1-on-a-mac/ http://stackoverflow.com/questions/9714899/php-mysql-difference-between-127-0-0-1-and-localhost http://superuser.com/questions/744972/connecting-to-mysql-from-127-0-0-1-instead-of-from-localhost http://blog.csdn.net/xifeijian/article/details/12879395 http://blog.csdn.net/topasstem8/article/details/18357789
昨天晚上用wget命令下载了WOW客户端,要是搁到往常,还必须开机电脑下载,现在只需要再路由器的ssh里执行以下即可!

离线下载BT和ED2K还在研究中

wget http://wow.zip 2>&1 >/dev/null &

你是不是已经厌倦了每次git push的时候每次都要输入用户名密码,使用下面的方法可以让你使用ssh协议通过密钥验证的方式让你得到解脱。

有两种修改方法

不过再实施前,请先准备好自己的密钥

ssh-keygen -t rsa -C "your_name"

然后登录https://github.com/settings/ssh,添加当前计算机的~/.ssh/id_rsa.pub公钥内容到github。

之后我们使用ssh [email protected]验证是否添加成功,如果返回以下内容,即代表添加成功!

Hi phpgao! You've successfully authenticated, but GitHub does not provide shell access.

下一步就是让我们的git使用公钥验证。

clone

保存你的最后一次修改并提交。

删除项目

使用下面的命令clone项目

# 采用ssh的方式克隆项目
# someaccount/someproject.git 中 some account为github用户名/someproject为仓库名

git clone [email protected]:phpgao/BaiduSubmit.git

修改https

git remote set-url origin [email protected]:someaccount/someproject.git

顺便提一下,老高的git push总是报warning: push.default is unset错误,今天终于知道为啥了。原来是版本兼容性的原因,低版本的git push如果不指定分支名,就会全部推送,而新版只会推送当前分支。

解决的办法也很简单,我们只需要明确指定应该推送方式即可,至于选择哪种方式,It's up to you.


# 全部推送
git config --global push.default matching

# 部分推送
git config --global push.default simple

kangle是一款国人产的服务器软件,老高经常使用它搭建测试环境。

安装

kangle的安装主要分两大块:kangle+easypanel。

# centos下一键安装命令
yum -y install wget;wget http://download.kanglesoft.com/easypanel/ep.sh -O ep.sh;sh ep.sh

使用

安装完成后,使用方法: 管理面板网址: http://服务器ip:3312/admin/ 独立网站管理: http://服务器ip:3312/vhost/

Reference:

http://www.kanglesoft.com/thread-5891-1-1.html

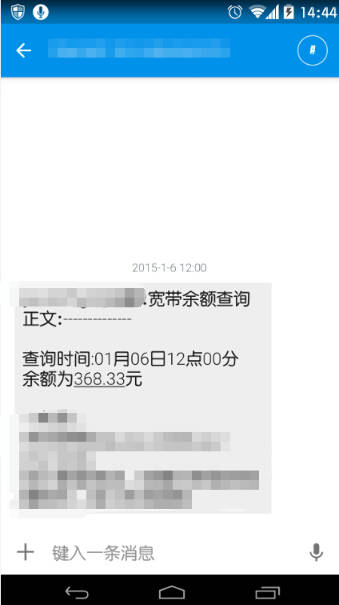
家里的宽带是包年按天扣费,时间长了就忘了改什么时候续费了。

抽时间写了个模拟登录10010.com的脚本,自动查询余额。

每天中午12点查一次,省得下次又欠费了。

模拟登录的过程很简单,获取查询的cookie需要两步请求,拿到cookie后可以随意查询。

有TX想看源码么?

查询联通宽带余额的脚本

已贴源码

#!/usr/bin/env python
# encoding: utf-8


"""
@version: 0.2
@author: phpergao
@license: Apache Licence 
@contact: [email protected]
@site: http://www.phpgao.com
@software: PyCharm
@file: 10010.py
@time: 15-1-3 下午6:06
一键查询联通宽带余额
"""

import urllib2
import cookielib
import json


class Crawl():
    def __init__(self, username, passwd, debug=False):
        (self.username, self.passwd) = (username, passwd)

        self.cookie = cookielib.CookieJar()
        cookieHandler = urllib2.HTTPCookieProcessor(self.cookie)
        self.is_debug = debug
        if self.is_debug:

            httpHandler = urllib2.HTTPHandler(debuglevel=1)
            httpsHandler = urllib2.HTTPSHandler(debuglevel=1)
            opener = urllib2.build_opener(cookieHandler, httpHandler, httpsHandler)

        else:
            opener = urllib2.build_opener(cookieHandler)

        urllib2.install_opener(opener)
        self.last_url = ''

    def get_html(self, url, postdata=''):

        print "Requesting for %s" % url

        if postdata != '':
            req = urllib2.Request(url, postdata)
        else:
            req = urllib2.Request(url)

        req.add_header('User-Agent', 'Mozilla/5.0 (Ubuntu; X11; Linux i686; rv:8.0) Gecko/20100101 Firefox/8.0')
        req.add_header('Content-Type', 'application/x-www-form-urlencoded')
        req.add_header('Cache-Control', 'no-cache')
        req.add_header('Accept', '*/*')
        req.add_header('Connection', 'Keep-Alive')

        try:
            resp = urllib2.urlopen(req)
        except Exception as e:
            print e

        self.last_url = url
        if self.is_debug:
            print "method: %s" % req.get_method()
            crawl.tell_cookie()

        return resp

    def tell_cookie(self):
        for item in self.cookie:
            print "cookie name : %s ---- value: %s" % (item.name, item.value)

    def get_balance(self):


        # 首页
        url_home = "http://www.10010.com/"
        # 登录主页
        url_login = "https://uac.10010.com/portal/mallLogin.jsp?redirectURL=http://www.10010.com"
        # 登录框架页
        url_frame = "https://uac.10010.com/portal/homeLogin"
        # 登录地址
        # 这里需要观察一下chrome的发送信息,需要自己改的有areaCode和arrcity
        # 就是登录时候选择的信息
        # 说是post,其实只是明文GET 囧
        # 无力吐槽
        url_post = "https://uac.10010.com/portal/Service/MallLogin?callback=jQuery172006519943638704717_" \
                   "1420279331097&redirectURL=http%3A%2F%2Fwww.10010.com&userName=" + str(self.username) + "&password=" \
                   + str(self.passwd) + "&pwdType=01&productType=04&redirectType=01&rememberMe=1&areaCode=841" \
                                        "&arrcity=%E8%A5%BF%E5%AE%89"

        # 点击查询按钮链接
        cookie1 = "http://iservice.10010.com/ehallService/static/login/r?menuid=000100010013"

        # 点击后获取到key为e3的cookie,参数可能会变
        cookie2 = "http://iservice.10010.com/e3/static/check/checklogin/?_=1420301171070"

        # 查询余额页面
        url_balance = "http://iservice.10010.com/e3/query/account_balance.html"
        # 查询余额接口
        url_last = "http://iservice.10010.com/e3/static/query/accountBalance/search?"

        # self.get_html(url_home)
        # self.get_html(url_login)
        self.get_html(url_frame)
        self.get_html(url_post)
        self.get_html(url_home)
        self.get_html(cookie1)
        # a=1意思是将请求方法变为POST
        self.get_html(cookie2, "a=1")
        self.get_html(url_balance)

        return self.get_html(url_last, "a=1")


if __name__ == '__main__':
    crawl = Crawl(xxxxx, xxxxx)
    info = crawl.get_balance()

    data = json.load(info)
    print data['realtimebalance']

数据拿到了剩下的问题就是如果发送到手机了,老高前几天写了个飞信发送短信脚本,中国移动的用户有福了。