标签 compile 下的文章
Linux服务器配置memcached并启用PHP支持
最近在服务器上部缓存系统,记录一下PHP安装memcached扩展。
彻底解决编译PHP找不到libc-client.a的问题
最近PHP爆出漏洞,老高也在升级PHP版本,并加入一些支持,但是遇到这个问题很蛋疼
configure: error: Cannot find imap library (libc-client.a). Please check your c-client installation.
网上搜了各种教程,各种cp都没用,索性我们就自己编译吧!
编译openwrt
一些资料
安装编译nginx
今天老高更新了一下nginx,顺便把nginx的安装编译过程记录一下,分享给大家!
一并送上之前老高的博文:
下载
官网下载地址:http://nginx.org/en/download.html
准备
安装nginx时必须先安装相应的编译工具
yum -y install gcc gcc-c++ autoconf automake
yum -y install zlib zlib-devel openssl openssl-devel pcre-devel
centos没有安装make编译器
yum -y install gcc automake autoconf libtool make
建立nginx 组
groupadd -r nginx
useradd -s /sbin/nologin -g nginx -r nginx
注释:
zlib:nginx提供gzip模块,需要zlib库支持 openssl:nginx提供ssl功能 pcre:支持地址重写rewrite功能
修改版本号
再编译之前修改默认的版本号是个不错的习惯
vim src/core/nginx.h

#define NGINX_VERSION      "0.0.0"
#define NGINX_VER          "phpergao" NGINX_VERSION
编译
高大上的编译参数
./configure \
--prefix=/usr \
--sbin-path=/usr/sbin/nginx \
--conf-path=/etc/nginx/nginx.conf \
--error-log-path=/var/log/nginx/error.log \
--pid-path=/var/run/nginx/nginx.pid \
--user=nginx \
--group=nginx \
--with-http_ssl_module \
--with-http_flv_module \
--with-http_gzip_static_module \
--http-log-path=/var/log/nginx/access.log \
--http-client-body-temp-path=/var/tmp/nginx/client \
--http-proxy-temp-path=/var/tmp/nginx/proxy \
--http-fastcgi-temp-path=/var/tmp/nginx/fcgi \
--with-http_stub_status_module \
--with-http_sub_module \
--with-http_spdy_module
安装
make && make install
添加服务
以下是service的脚本。
注:脚本中部分变量值可能需要修改以找到对应的文件,如果出现文件夹找不到的错误,请使用mkdir -p创建对应路径
# 先执行 vim /etc/init.d/nginx
# 再copy以下脚本

#!/bin/sh
#
# nginx        Startup script for nginx
#
# chkconfig: - 85 15
# processname: nginx
# config: /etc/nginx/nginx.conf
# config: /etc/sysconfig/nginx
# pidfile: /var/run/nginx.pid
# description: nginx is an HTTP and reverse proxy server
#
### BEGIN INIT INFO
# Provides: nginx
# Required-Start: $local_fs $remote_fs $network
# Required-Stop: $local_fs $remote_fs $network
# Default-Start: 2 3 4 5
# Default-Stop: 0 1 6
# Short-Description: start and stop nginx
### END INIT INFO

# Source function library.
. /etc/rc.d/init.d/functions

if [ -L $0 ]; then
    initscript=`/bin/readlink -f $0`
else
    initscript=$0
fi

sysconfig=`/bin/basename $initscript`

if [ -f /etc/sysconfig/$sysconfig ]; then
    . /etc/sysconfig/$sysconfig
fi

nginx=${NGINX-/usr/sbin/nginx}
prog=`/bin/basename $nginx`
conffile=${CONFFILE-/etc/nginx/nginx.conf}
lockfile=${LOCKFILE-/var/lock/subsys/nginx}
pidfile=${PIDFILE-/var/run/nginx.pid}
SLEEPMSEC=${SLEEPMSEC-200000}
UPGRADEWAITLOOPS=${UPGRADEWAITLOOPS-5}
RETVAL=0

start() {
    echo -n $"Starting $prog: "

    daemon --pidfile=${pidfile} ${nginx} -c ${conffile}
    RETVAL=$?
    echo
    [ $RETVAL = 0 ] && touch ${lockfile}
    return $RETVAL
}

stop() {
    echo -n $"Stopping $prog: "
    killproc -p ${pidfile} ${prog}
    RETVAL=$?
    echo
    [ $RETVAL = 0 ] && rm -f ${lockfile} ${pidfile}
}

reload() {
    echo -n $"Reloading $prog: "
    killproc -p ${pidfile} ${prog} -HUP
    RETVAL=$?
    echo
}

upgrade() {
    oldbinpidfile=${pidfile}.oldbin

    configtest -q || return
    echo -n $"Starting new master $prog: "
    killproc -p ${pidfile} ${prog} -USR2
    echo

    for i in `/usr/bin/seq $UPGRADEWAITLOOPS`; do
        /bin/usleep $SLEEPMSEC
        if [ -f ${oldbinpidfile} -a -f ${pidfile} ]; then
            echo -n $"Graceful shutdown of old $prog: "
            killproc -p ${oldbinpidfile} ${prog} -QUIT
            RETVAL=$?
            echo
            return
        fi
    done

    echo $"Upgrade failed!"
    RETVAL=1
}

configtest() {
    if [ "$#" -ne 0 ] ; then
        case "$1" in
            -q)
                FLAG=$1
                ;;
            *)
                ;;
        esac
        shift
    fi
    ${nginx} -t -c ${conffile} $FLAG
    RETVAL=$?
    return $RETVAL
}

rh_status() {
    status -p ${pidfile} ${nginx}
}

# See how we were called.
case "$1" in
    start)
        rh_status >/dev/null 2>&1 && exit 0
        start
        ;;
    stop)
        stop
        ;;
    status)
        rh_status
        RETVAL=$?
        ;;
    restart)
        configtest -q || exit $RETVAL
        stop
        start
        ;;
    upgrade)
        rh_status >/dev/null 2>&1 || exit 0
        upgrade
        ;;
    condrestart|try-restart)
        if rh_status >/dev/null 2>&1; then
            stop
            start
        fi
        ;;
    force-reload|reload)
        reload
        ;;
    configtest)
        configtest
        ;;
    *)
        echo $"Usage: $prog {start|stop|restart|condrestart|try-restart|force-reload|upgrade|reload|status|help|configtest}"
        RETVAL=2
esac

exit $RETVAL
mkdir -p /var/tmp/nginx/client
chmod 755 /etc/init.d/nginx
chkconfig --add nginx
使用
# 重启nginx
service nginx restart
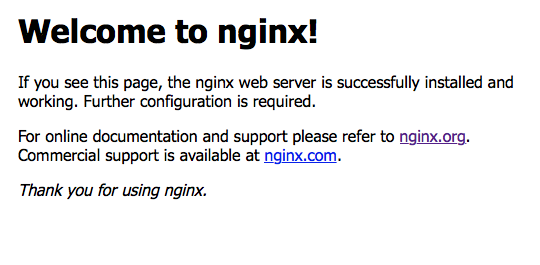
现在访问你的IP或者域名就可以访问了!
参考链接:
http://blog.sina.com.cn/s/blog_6f2274fb01012nq5.html http://www.cnblogs.com/suihui/archive/2013/04/13/3018557.html
编译PHP5.6
准备
PHP的安装最头疼的就是因为某些类库没有安装而报错,所以编译前请确保以下包已安装
yum groupinstall "development tools"

yum install -y gcc gcc-c++ autoconf libjpeg libjpeg-devel libpng libpng-devel freetype freetype-devel libpng libpng-devel libxml2 libxml2-devel zlib zlib-devel glibc glibc-devel glib2 glib2-devel bzip2 bzip2-devel ncurses curl curl-devel openssl-devel gdbm-devel db4-devel libXpm-devel libX11-devel gd-devel gmp-devel readline-devel libxslt-devel expat-devel xmlrpc-c xmlrpc-c-devel
编译
高大上的编译选项
./configure  \
--prefix=/usr/local/php  \
--enable-fpm  \
--with-curl  \
--with-openssl  \
--enable-mbregex  \
--with-mysql  \
--with-mysqli  \
--with-mysql-sock  \
--enable-pdo  \
--with-pdo-mysql  \
--with-pdo-pgsql  \
--with-pdo-sqlite  \
--enable-mysqlnd  \
--with-gd  \
--enable-gd-native-ttf  \
--enable-exif  \
--with-jpeg-dir=/usr/local/jpeg  \
--with-png-dir=/usr/local/png  \
--with-freetype-dir=/usr/local/freetype  \
--enable-gd-jis-conv  \
--with-gettext  \
--with-zlib  \
--enable-zip  \
--with-bz2  \
--disable-fileinfo  \
--enable-xmlreader  \
--enable-xmlwriter  \
--with-xmlrpc  \
--enable-mbstring  \
--enable-inline-optimization \
20150524更新 5.6.9编译配置选项,推荐使用
./configure --prefix=/usr/local/php --with-pdo-pgsql --with-pdo-sqlite --with-zlib-dir --with-freetype-dir --enable-mbstring --with-libxml-dir=/usr --enable-xmlreader --enable-xmlwriter --enable-soap --enable-calendar --with-curl --with-mcrypt --with-zlib --with-gd --with-pgsql --disable-rpath --enable-inline-optimization --with-bz2 --with-zlib --enable-sockets --enable-sysvsem --enable-sysvshm --enable-pcntl --enable-mbregex --enable-exif --enable-bcmath --with-mhash --enable-zip --with-pcre-regex --with-mysql --with-pdo-mysql --with-mysqli --with-mysql-sock --enable-mysqlnd --with-jpeg-dir=/usr --with-png-dir=/usr --enable-gd-native-ttf --with-openssl --enable-ftp --with-imap=/usr/local/php-imap --with-imap-ssl --with-kerberos --with-gettext --with-xmlrpc --with-xsl --enable-opcache --enable-fpm --with-fpm-user=www --with-fpm-group=www --disable-fileinfo
编译中出了问题请参考
如果内存小于1G,需要加上--disable-fileinfo
找到二进制文件
添加环境变量
whereis php
#/usr/local/bin/php
echo $PATH
#/usr/local/sbin:/usr/local/bin:/sbin:/bin:/usr/sbin:/usr/bin:/root/bin
export PATH=/usr/local/php/bin:$PATH
echo $PATH
#/usr/local/php/bin:/usr/local/sbin:/usr/local/bin:/sbin:/bin:/usr/sbin:/usr/bin:/root/bin
php -v
#PHP 5.6.0 (cli) (built: Sep 10 2014 23:54:43)
编辑profile
ps./etc/profile:在登录时,操作系统定制用户环境时使用的第一个文件,此文件为系统的每个用户设置环境信息,当用户第一次登录时,该文件被执行
pss./etc/environment:在登录时操作系统使用的第二个文件,系统在读取你自己的profile前,设置环境文件的环境变量。
pss.~/.bash_profile:在登录时用到的第三个文件是.profile文件,每个用户都可使用该文件输入专用于自己使用的shell信息,当用户登录时,该 文件仅仅执行一次!默认情况下,他设置一些环境变游戏量,执行用户的.bashrc文件。/etc/bashrc:为每一个运行bash shell的用户执行此文件.当bash shell被打开时,该文件被读取.
pss.~/.bashrc:该文件包含专用于你的bash shell的bash信息,当登录时以及每次打开新的shell时,该该文件被读取。
vim /etc/profile
在最后一行加上:export PATH="/usr/local/php/bin:$PATH"
最后:
source /etc/profile
或者直接把php拷贝至/usr/local/bin/下
cp /usr/local/php/bin/php /usr/local/bin/
配置文件
cp /tmp/php-5.6.0/php.ini-production /usr/local/php/etc/php.ini
启动php-fpm
/usr/local/php/sbin/php-fpm
运行时指定配置文件
/usr/local/php/sbin/php-fpm -c /usr/local/php/etc/php.ini -y /usr/local/php/etc/php-fpm.conf
开机自启动
echo "/usr/local/php/sbin/php-fpm -c /usr/local/php/etc/php.ini -y /usr/local/php/etc/php-fpm.conf" >> /etc/rc.local
或者
vim /etc/rc.local

# ADD
/usr/local/php/sbin/php-fpm -c /usr/local/php/etc/php.ini -y /usr/local/php/etc/php-fpm.conf
配置php-fpm
配置文件路径/usr/local/php/etc/php-fpm.conf